How to associate your Social Networking Profile to Revbay
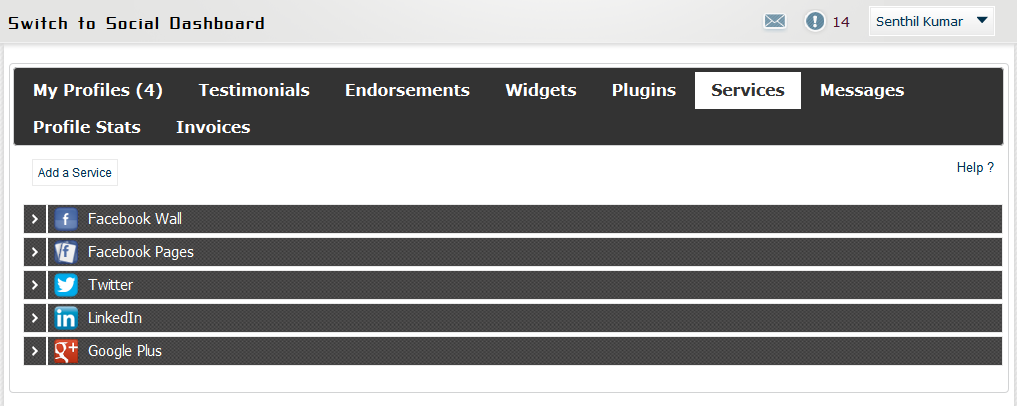
Services help businesses to share the testimonials received to their Social Networking Systems (SNS). Currently supported SNSes are
- Facebook Wall
- Facebook Page
- Google+ Share
Advantages of Services
- Once associated you can publish your testimonials automatically when you approve the testimonial. This helps you get your testimonials noticed at various places at the same time
- You can re-publish these testimonials again and again in the future irrespective of when it was given. By this it will help you to get your social networking pages be fresh and people who are following your page keep getting updates every now and then.
- You can associate multiple SNSes to single profile.
- If you own or have multiple pages or accounts of a single SNS e.g. multiple Facebook pages or multiple twitter accounts, then you can associate Each account or page to your TestimonialsFor profile
- As a avid business user if you have multiple profiles in Revbay, then you can associate your SNS accounts and pages to each of these profiles
- You can make use of our flexible Sharer tool on each testimonials to share your testimonial to all the accounts you have associated
Some Considerations while associating to Services
- Ensure you have admin or owner access to the particular account in the SNSes. If you are not the owner or admin, then you might not be able to associate.
- You need to authorize Revbay to pick up information and to post / share in your SNS. While associating you might be asked for authorization. Please provide any such authorizations
- Ensure the authorization stays always. For Example if you have authorized Revbay in Twitter and Facebook and updated our database. However if you revoke the authorization in your Twitter Settings or Facebook Settings, then sharing might not work, even it shows Revbay has been given the authorization
- You can revoke sharing option by disabling the service association, without even removing the association. When you disable, it will stop sharing. This can be used as temporary solution.
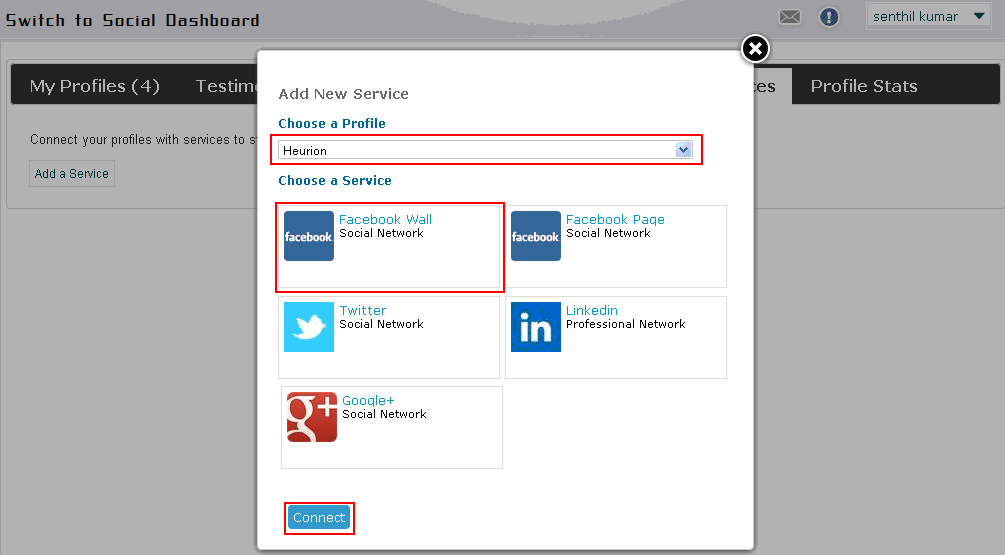
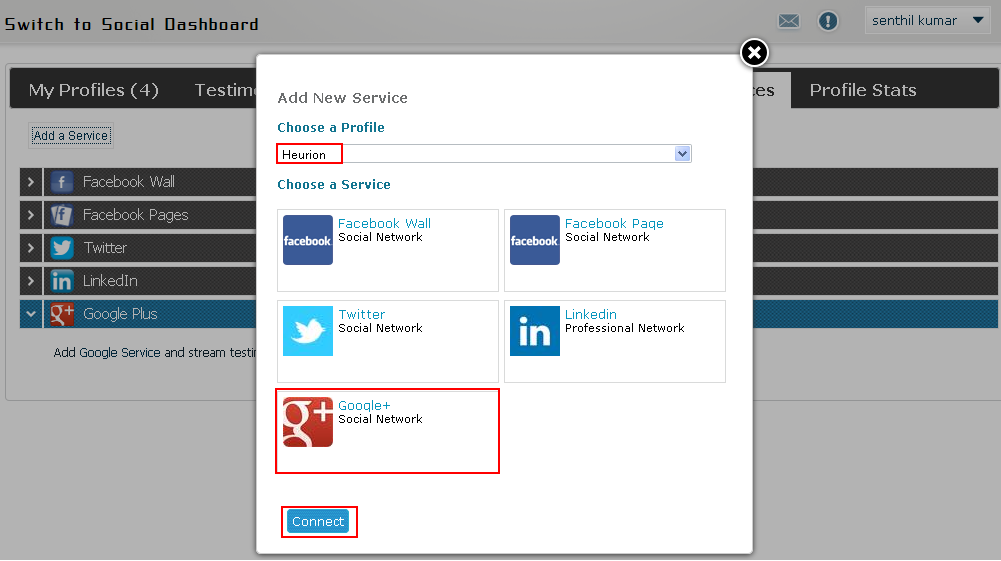
How To Create a Service?
You can create a service when you click on “Add Service” link under the Services section. On Click, a popup appears with a dropdown listing the profiles to which you can attach the SNS and also the list of SNS systems for you to select. Once you select the profile and the type of SNS, on click of Submit the service is created.
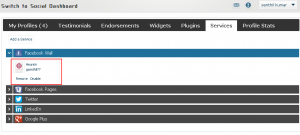
Associating to a Facebook Wall Service
Step1: Select “Add Service”, Select the Profile from drop down, Select Facebook Wall Social Network. Click on Submit button
Step 2: Authorize Revbay to connect and use Facebook
Step 3: Page refreshes with your facebook wall (profile page) associated to Revbay.
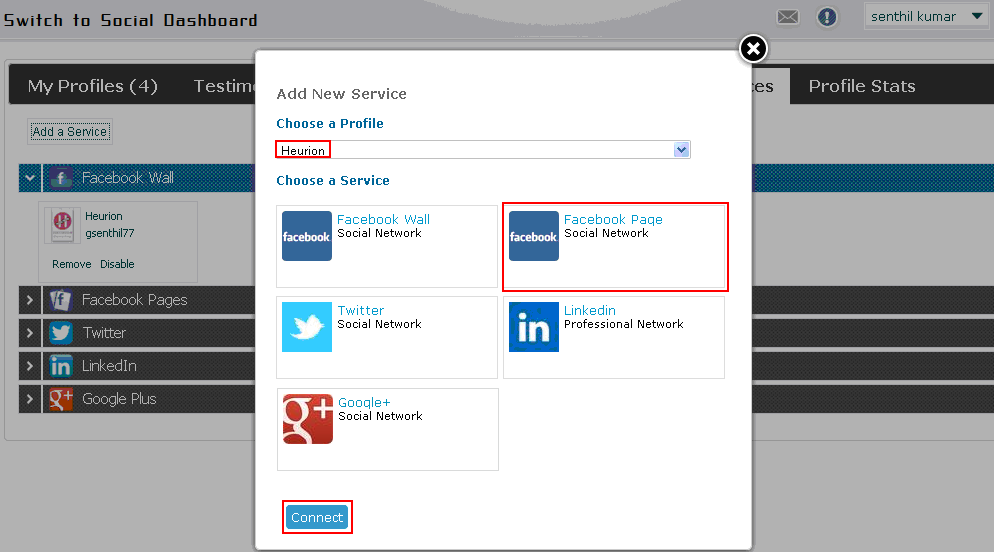
Associating to a Facebook Page Service
Step1:Select “Add Service”, Select the Profile from drop down, Select Facebook Page Social Network. Click on Submit button.
Step 2: Authorize Revbay to connect and use Facebook
Step 3: View list of Facebook pages to which you have Admin Access
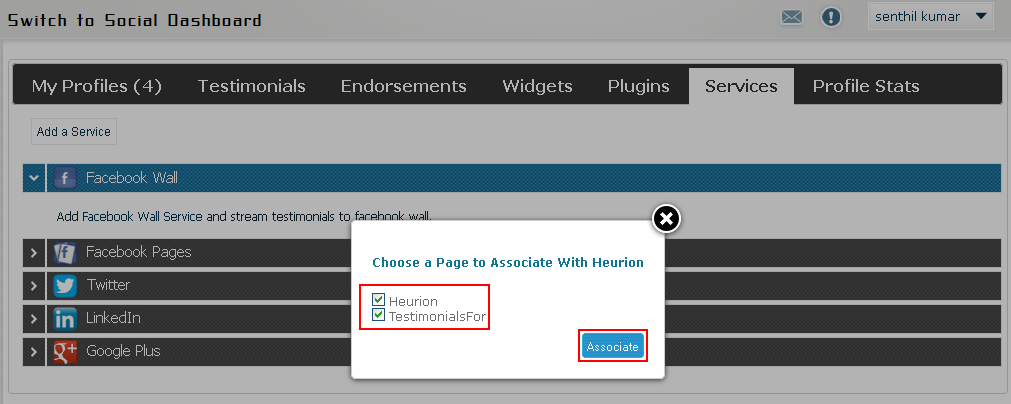
Step 4: Check/Un-check the checkboxes to select Facebook Pages to which you wish to post reviews
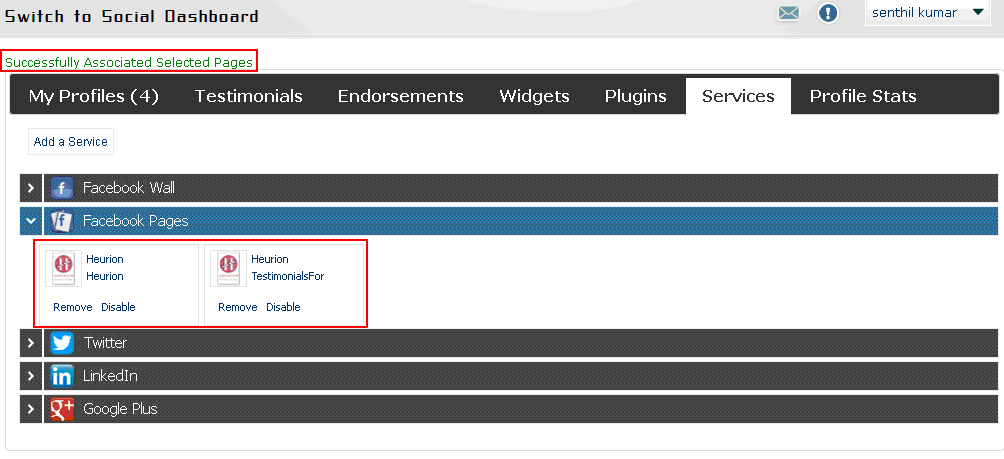
Step 5: Page refreshes with all the selected Facebook pages being associated to the selected profile
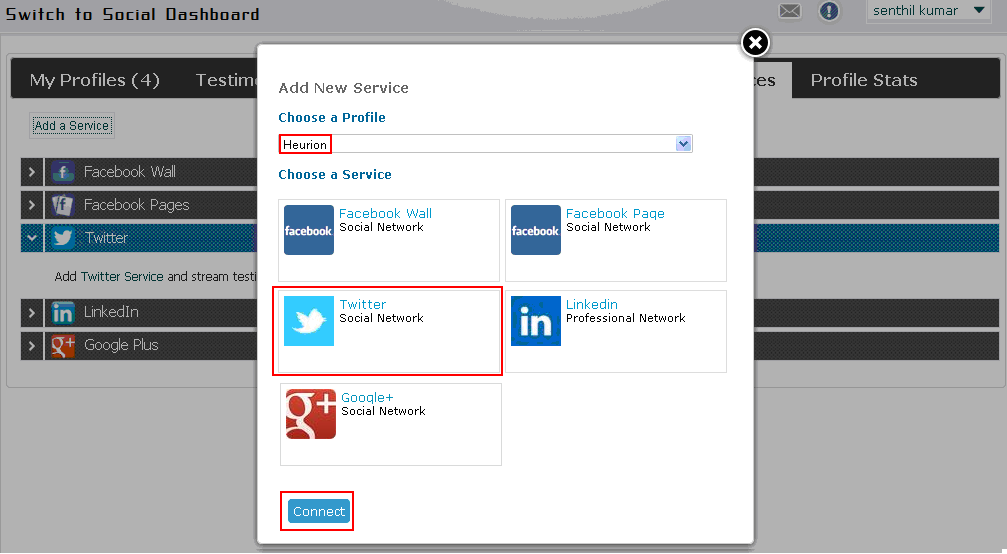
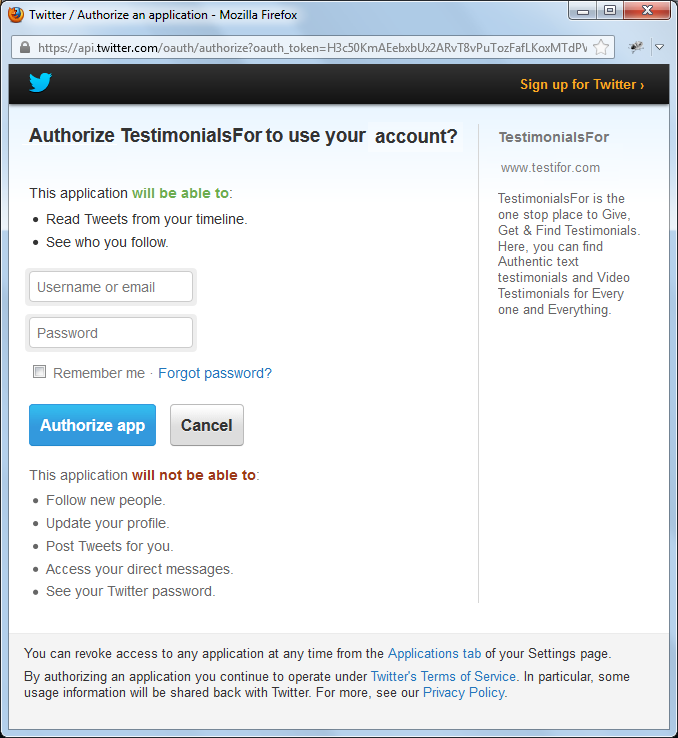
Associating to a Twitter Account Service
Step1: Select “Add Service”, Select the Profile from drop down, Select Twitter Social Network. Click on Submit button
Step 2: Authorize Revbay to connect and use Twitter
Step 3: Page refreshes with your twitter account associated to Revbay.

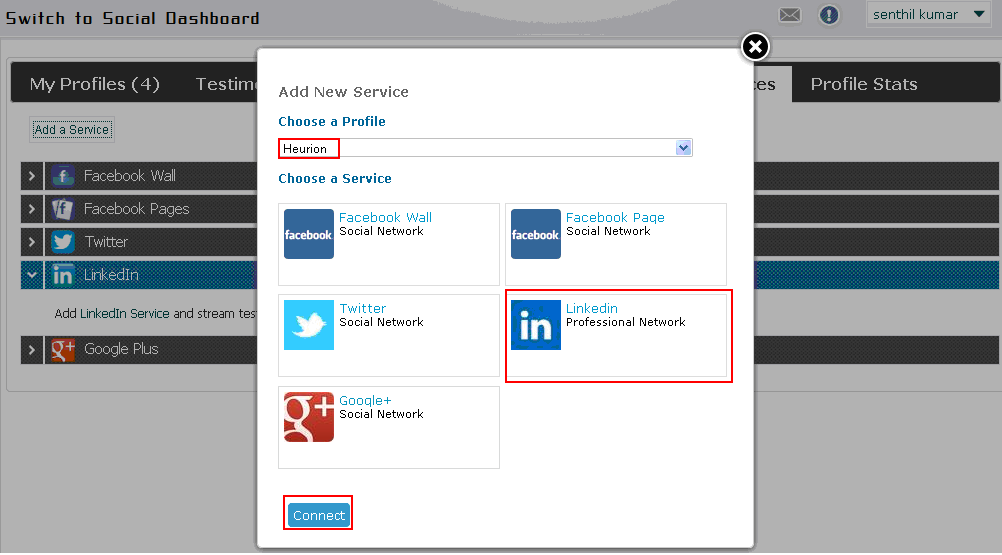
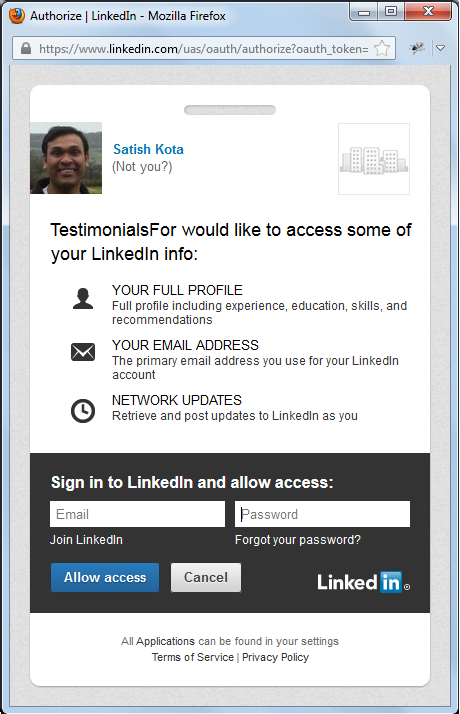
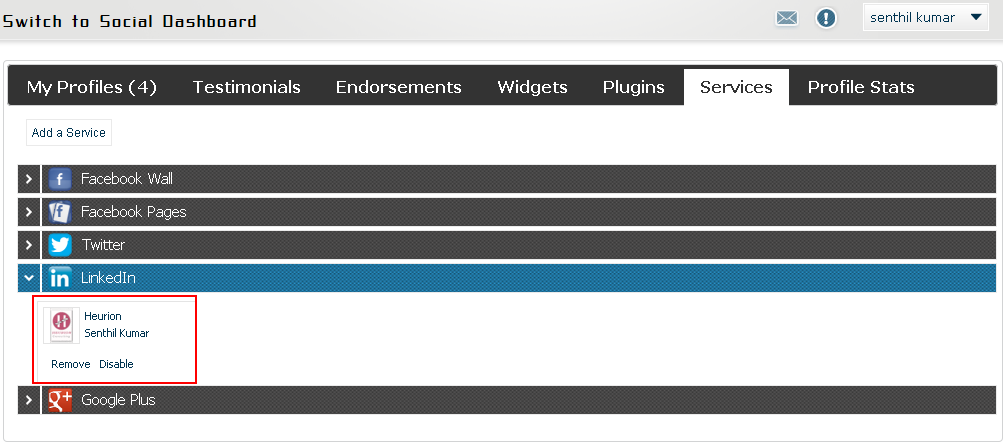
Associating to a LinkedIn Account Service
Step1: Select “Add Service”, Select the Profile from drop down, Select Linkedin Professional Network. Click on Submit button
Step 2: Authorize Revbay to connect and use LinkedIn
Step 3: Page refreshes with your LinkedIn associated to Revbay.
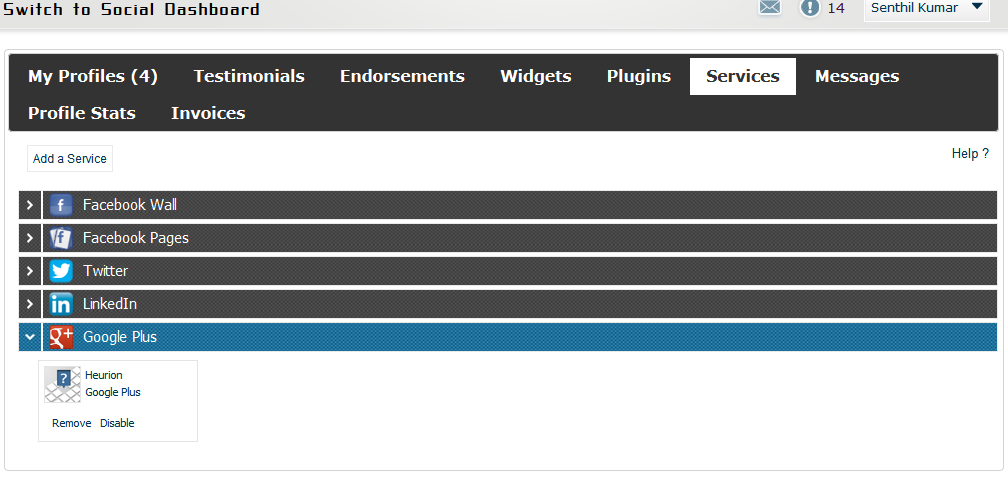
Associating to a Google+ Account Service
Step1: Select “Add Service”, Select the Profile from drop down, Select LinkedIn Professional Network. Click on Submit button
Step 2: Page refreshes and your Google Account is associated. Google does not require authorization while association. It requires authorization while testimonials are being shared. Google requests for Login while the testimonial share is made.
We keep upgrading our systems to help you support additional Social Networking Systems.
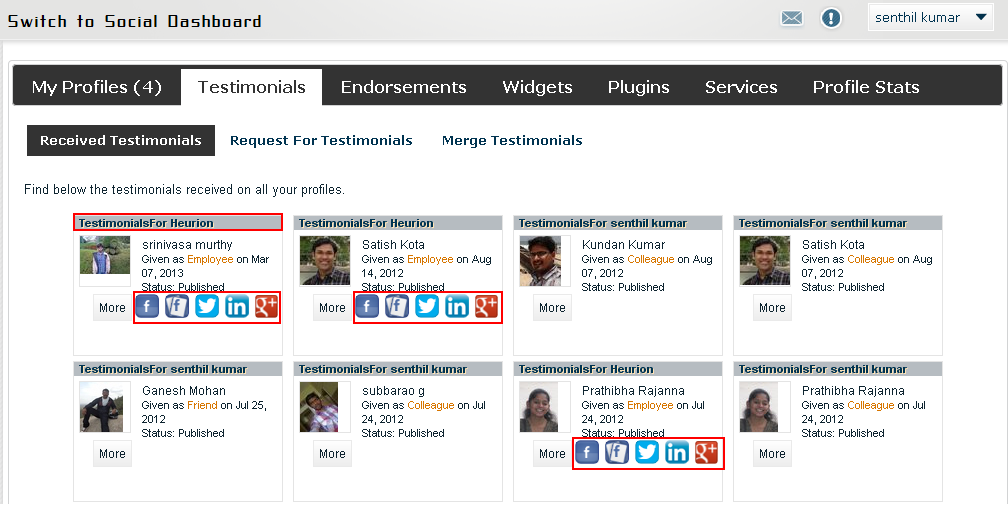
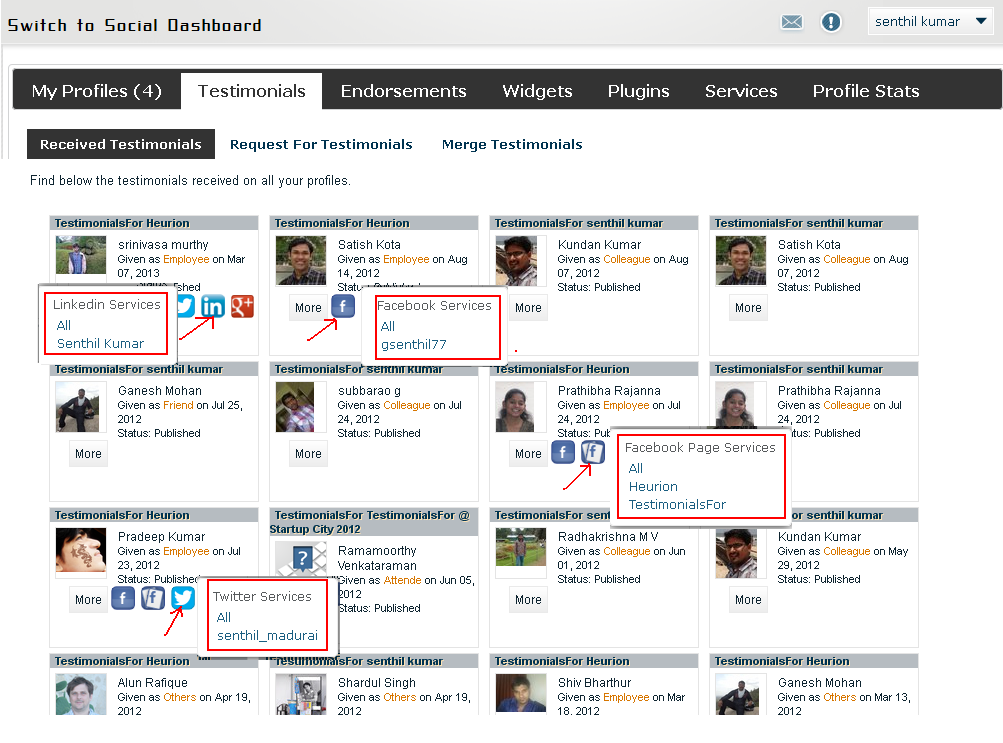
Service Icons on Testimonials Received Section
Once you have associated your Social networking systems, you can see icons pertaining to the SNSes for each testimonials under the TESTIMONIALS –> RECEIVED TESTIMOINALS section. You can click on the icon and share testimonials to either one of the associated account or page or to all accounts and pages of that SNS.